Drawstring Pouch with French Seams
 I use a small organza pouch filled with crystals as a safe-driving charm in my car but after a few years the original, store-bought pouch was looking a little rough. Making a new one was quick and easy and used one of my favorite techniques: French seams! These bags are also great for gift-giving and storage of small pieces of jewelry. You could also make them out of muslin for reusable tea bags.
For this project you’ll need:
- 10″x5″ piece of tulle, organza or other fabric
- Straight pins
- Needle & Thread (with or without a sewing machine)
- Seam ripper or small pair of scissors
- 2 20″ pieces of ribbon
- Tapestry needle or small safety pin
Optional supplies:
- Iron and ironing board (organza is slippery stuff and really benefits from a light pressing)
- Decorative ribbon end caps
- Fray-check
Instructions:
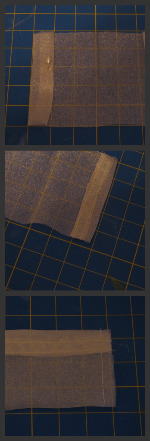
- Fold over each short end of the fabric 3/4 inch and then 1 inch again. Press in place if you like (I really suggest this) and pin in place.
- Sew along the base of the folded edge and then again, about a quarter of an inch above. If you’re using thick ribbon, you may want to make both your folds and the spacing of these two rows of stitches wider. This created the channel the ribbon will live in, later.
 Fold the fabric in half with the wrong sides together (meaning the folded edges are inside, the way they will be on the final pouch) and pin in the middle to keep the material from shifting. Sew along the open side edges about a quarter of an inch or more in and trim away any excess. You don’t want to be too close to the seam but you don’t want a whole lot extra hanging out there, either.
- Turn the pouch inside out and press if you like (I like), pin in the center and then sew along the side seams again, far enough in that you enclose the raw edges from the previous step. This is, by the way, the French seam part of things and it’s what makes this technique so cool: ravel-prone fabric is thwarted before it can even start!
- Return the pouch to it’s right-side-out orientation and use a small pair of scissors or a seam ripper to gently cut a slit in the top layer of fabric between those first two rows we stitched. Make these slits as close to the side seams as possible, a total of 4 slits.
- Either attach the safety pin to one end of a piece of ribbon or thread it through a tapestry needle and pass it through the channel on the front (doesn’t really matter which side you call the front, by the way, just pick one) and then through the back, with the ends of the ribbon exiting on the same side of the bag. Try to keep the ribbon straight in the channel–it’s just neater that way. Repeat with the other pieces of ribbon but starting with the slits on the opposite side of the ones you used before.You should end up with each ribbon ending on one side of the pouch, one looping around the other.
- Knot the two ends of each ribbon together or enclose the ends in a ribbon end. If you go the knotted ends route you may want to dab a little Fray Check or other seam sealer onto the ends to keep them from snagging and unraveling when in use.
And that’s all there is to it.
French seams come in handy with any fabric you need to keep a tight reign on. They are also a handy trip when making purse linings or other insides that will be seen and you want your seams hidden. Even if your enclosing seam is visible it’s still a lot prettier than exposed, raw edges.
