MCC: Pomegranate Khabisa

Nibbles

It’s the last Thursday of the month which means another foray into the realm of Medieval food!

~~~oOo~~~

Once again we took a recipe from the Anonymous Andalusian cookbook, this time a sweet treat of pomegranate.


Pomegranate Khabisa

Pomegranate Khabisa

Khabisa with Pomegranate

“Take half a ratl of sugar and put it in a metal or earthenware pot and pour in three ratls of juice of sweet pomegranates [rumman sufri; probably tart pomegranates were more common in cooking] and half a uqiya of rosewater, with a penetrating smell. Boil it gently and after two boilings, add half a mudd of semolina and boil it until the semolina is cooked. Throw in the weight of a quarter dirham of ground and sifted saffron, and three uqiyas of almonds. Put it in a disk and sprinkle over it the like of pounded sugar, and make balls [literally, hazelnuts] of this.”

Andalusian Measurements:
ratl = a pound; in school I learned little phrase “a pint is a pound, the whole world round” which means you can use a volumetric pint of water for recipes that call for equal weights of flour and water and whatever else (very common in baking ratios). Since pomegranate juice isn’t incredibly dense, we’re using a volumetric pint for the ratls of juice–if it were a heavier liquid (like cream or buttermilk), you’d want to actually weigh the liquid
uqiya = approx. 1.3 oz
mudd = 16 cups; it’s actually 4 Liters, if you want to be exact; if you’ve ever used a 4-cup Pyrex measuring cup, though, you know that 4 cups is roughly equivalent to a Liter
dirham = roughly a teaspoon

As written, this makes a pretty big batch of pomegranate treats. A slightly more manageable quantity can be made by the recipe below:

Pomegranate Khabisa

¼ cup + 1 Tbsp granulated sugar, plus additional for rolling
1 pint pomegranate juice
¼ oz rosewater
1 ½ cups semolina flour
¼ cup chopped almonds
pinch saffron

  1. Combine the sugar, juice and rosewater in a saucepan and bring to a boil. A non-stick pot is especially helpful and the final product is pretty sticky.
  2. Mix together the dry ingredients and then add them to the liquid, bringing to a boil again.
  3. Stirring constantly, continue to cook the mixture until very thick–like a thick oatmeal, this won’t take long at all.
  4. Scoop out small amounts of the mixture, roll into balls and then roll in granulated sugar. Place on a platter or inside little truffle or mini-muffin cups  and serve.

Steps to make Khabisa

As simple as boil, cook, scoop and roll.

Depending on the brand of pomegranate juice you use will determine the finished color of the khabisa. I’ve made it before with the popular grocery store brand that comes in the double sphere bottle and it’s come out much more vibrant than this batch, which was made with an organic pomegranate juice and ended up more a deep plum color.

Kept in an airtight container these will keep for a week, at least (if they last that long). We love the chewy, sweet treats with just a bit of crunch from the nuts (we subbed cashews–not correct for the time period but preferred in this house). And if you can stand to leave some for the next day, the rosewater becomes just a little more prominent and adds a nice dimension to the dish.

~~~oOo~~~

Did you give this month’s dish a try? Link up in the comments!

Want to get the next recipe at the beginning of the month instead of waiting for my reveal post? Sign up here!

MCC: Lemon Hart

Nibbles
Lemon Hart metaloaf

Lemon Hart

This month’s recipe comes to us from (the translated) The Sensible Cook: Dutch Foodways in the Old & New World (relatively speaking, of course), and dates back to 1669.

To Prepare a Lemon-Hart

Take minced veal just like for meatballs, add to it nutmeg, pepper and salt as well as peels of a fresh lemon cut into small pieces, for each pond of meat an egg yolk, a crushed rusk and mix it all together, shape it in the form of a large meatball or in the form of a heart, stew it with a little water. When done take off the fat, add Verjuice, butter, and peels of a salted lemon which has been boiled together, then dish up; a sauce is poured over made from Verjuice beaten with egg yolks.

Medieval Vocabulary 102

pond = approx. 430 grams which is, roughly, 15.16 oz–close enough to a pound that we’re going to call it even
rusk = the heel end of a loaf of bread, toasted
Verjuice = a tart condiment from unripe grapes, we substitute apple cider vinegar or wine vinegar (though it can be ordered online)
salted lemon = a type of preserved lemon; I have a quickie version of this that I’ll put below, but you can find preserved lemons at some specialty stores, too.

Basically we’re making a meatloaf, here, with ground veal if at all possible. If you can’t get or prefer not to use veal for whatever reason, very lean beef–the best quality you can afford–will be fine. You can also use venison (hart is another name for deer, after all), though it may be a little drier. The thing to notice with this recipe is that they made meatloaf much the way we would: mix up the meat with seasonings, an egg and some breadcrumbs and “bake”. Instead of ketchup or tomato sauce on top, it uses a tart egg sauce and also comes with it’s own gravy* thanks to the liquid added during and just after cooking.

Ingredients, to serve 6-8

2 lbs ground veal
1 tsp nutmeg
½ tsp pepper
1 tsp salt
2 Tbsp lemon zest
2 egg yolks
2 heels of bread, toasted and crumbled, or more as needed
1 cup warm water
For the gravy 

1 Tbsp apple cider or wine vinegar
2.5 Tbsp butter
the minced skin of one salted lemon


For the topping

2 tsp apple cider or wine vinegar
3 egg yolks

This manuscript describes a sort of basic stove one could fashion in the mid 1600s so while we might make this meatloaf in the oven, an alternative is to cook it on the stove over a low heat (hence the water added to the cooking vessel, making this more of a braised loaf). I’ve little doubt such loafs were made in a pot over flame (as minced meats won’t very well stay on a spit unless otherwise contained) as a large meatball for many years before we had modern stoves and ovens. If you have a Dutch oven or other vessel that can be used in both the oven and on the stove-top, you could split the difference and bake it in the oven per your usual meatloaf and then finish it on the stove.

Method

the ingredients for the lemon hart Combine the ground meat, seasonings, eggs and coarse bread crumbs. Shape into a large ball or decorative heart-shape and place in the bottom of a Dutch oven or roasting pan. Add 1 cup warm water to the bottom of the pot or pan and place over medium heat on the stove, covered, or in a 350°F oven for 1 hour or until the center of the load has reached 160 degrees Fahrenheit.
the cooked lemon hart, before deglazing or saucing Remove the lid and skim off any fat that may have accumulated in the pan. Add the apple cider or wine vinegar, butter and salted lemon zest and bring to a boil. (This is akin to modern chefs de-glazing a pan to make a rich gravy from the caramelized bits on the bottom.)
the sauced lemon hart Whisk together the topping ingredients (apple cider or wine vinegar and egg yolks) and pour over the loaf while still warm. (Between the heat of the load and the acid in the vinegar, the egg yolks will be cooked enough for safety. If you’re still concerned, you can whisk the topping over steaming water (a double boiler) until warm and the egg yolk coats the back of a spoon.)
Lemon Hart metaloaf Carefully transfer the Lemon Hart to a serving dish (I used 2 large spatulas and had a person standing by with the plate to quickly slip it under) and the gravy to a bowl. Let rest a few minutes before slicing and serving.

In the past I’ve baked this but decided to give the stove-top method a try this go ’round. On my electric stove I had to keep the heat down medium-low to prevent the liquid from boiling furiously and, even then, it took barely an hour to reach the right temperature.

Served with roasted new potatoes it made an excellent supper–the lemon is obviously there but not so overpowering as to make it unpleasant. You do want to make sure you only use the lemon zest and avoid the pith of the salted lemons–the preserving softens it a lot, making it much easier to remove.

Lemon Hart and Roasted New Potatoes

Meat and Potatoes Supper

*Because I let it go a smidgen too long, the gravy was non-existent, but the Lemon Hart was still moist and tasty so it wasn’t a great loss.

The next recipe for the Medieval Cooking Challenge will go out this weekend: sign up to get in on the scoop!

~~~oOo~~~

Quick Salted Lemons

There are several recipes out there for salted lemon preserves that are a common condiment in Middle Eastern food but they take several weeks to prepare. When I first did this recipe I didn’t have that kind of time so here’s what I came up with, instead.

Lemons, scrubbed clean of any waxes or residue
Kosher Salt

In a baking dish just larger than the lemon(s) you want to “preserve”, pour in a layer of Kosher salt, arrange the lemon(s) on top and pour more salt around them. Cover and bake in a 250F oven for 2 hours. Remove and let cool.

Pack the lemon(s) and salt in a fridge-safe container with a tight lid and they’ll keep for months.

Or, if you’re really in a hurry, split each lemon in quarters, lengthwise, but don’t cut all the way through one end. Sprinkle salt into the cut lemons, place in a microwavable container with additional salt, microwave for 2 minutes and then let cool. Store 1 night in the fridge, shaking or turning the container at least once, before using.

MCC: A Tarte of Proines (aka Spiced Plum Spread)

Nibbles

Medieval Cooking Challenge buttonIt’s the second month of the Medieval Cooking Challenge, an experiment where we take real Medieval recipes and prepare them in our modern kitchens, bringing the past into the present.

Spiced Plum Spread on Olive Oil Toast, garnished with Lemon Zest

Spiced Plum Spread on Olive-Oiled Toast, garnished with Lemon Zest

After last month’s Andalusian Lamb (which was a little complex), we’re going later within the Medieval period and a bit simpler in method of preparation. This recipe for a dried plum (aka prune–but don’t let the connotations of the word scare you off!) spread that is great on slices of baguette as an appetizer or an afternoon snack or used, as the name would suggest, as a tart filling or topping.


The original recipe is from 1587 England, from a book known as The Good Huswifes Jewell, 1587

To make a Tarte of Prunes [alternately spelled Proines]

Put your Prunes into a pot, and put in red wine or claret wine, and a little faire water, and stirre them now and then, and when they be boyled enough, put them into a bowle, and straine them with sugar, synamon and ginger.

Gotta love that creative spelling from back then!

The redacted recipe quantities I’ve taken (and adjusted ever so slightly) from a fabulous modern book: Shakespeare’s Kitchenby Francine Segan. Not all of the recipes in this book reference their original Italian or English inspirations but some do, and it was indispensable as I planned my first Medieval feast for 60-80 people.

~~~oOo~~~

Spiced Plum Spread

1.5 cups Red Wine
9 oz Pitted Dried Plums (aka prunes, about 30)
3 Tbsp Sugar
2 Tbsp minced Ginger
2 Cinnamon Stick (2 inches or so)

Combine all ingredients in a large pot and simmer until most of the liquid has either been absorbed or evaporated and what’s left is very thick. Remove the mixture from the heat and remove the cinnamon stick. Mash the cooked mixture until a fairly smooth consistency is reached.

Step-by-Step Spiced Plum Spread

Makes approximately 1 cup.

Originally I’d suggested using crystallized ginger and adding it to the mixture between the cooking and mashing stages but decided to go with the minced ginger since I had it on hand. (I buy it in the tubes from the produce section–comes in very handy and keeps wonderfully!) You can use more or less of the ginger and cinnamon to suit your own preferences.

~~~oOo~~~

At this point what you do with it is up to you. You could go old-school and fill a single large or several small tarts shells with the mixture and serve it as is. Or you can serve it, warm, in a small crock with fresh bread and soft butter like you would a marmalade or jelly. Based on the rich flavor this dish provides, I’m thinking a topping for a cream cheese tart would be fabulous–the cream cheese only slightly sweetened so as to cut the richness of the plum topping the way vanilla ice cream can cut through the richness of a double-chocolate cake.

If you have fresh plums available (I know we have a few left over from a recent farmers’ market trip) you can use them in addition to or instead of the dried variety but you’ll need to use more of them to start with as well as more sugar (drying concentrates the fruit’s flavor and sweetness) and it will probably need to cook longer to give it enough time to thicken properly.

I’ve got a party coming up next month so I’ve stashed mine in the freezer to save until then–it’ll be a nice addition to the menu I’ve got planned.

~~~oOo~~~

Did you try this month’s Medieval Cooking Challenge? Make sure to leave you link in the comments!

Would you like to get on the mailing list for future month’s challenges? Head over to the MCC page, sign up and grab the button for your sidebar!

MCC: Andalusian Lamb

Nibbles

Welcome to the first installment of the Medieval Cooking Challenge, an exploration of authentic Medieval flavors from our modern-day kitchens. To get the scoop on future challenges, head over to the Medieval Cooking Challenge page and join the mailing list!

~~~oOo~~~

April is prime time for finding a leg of lamb in the grocery store,so it seemed the perfect month for my favorite 13th Century recipe from the cookbook that simply goes by An Anonymous Andalusian (translated by Charles Perry). (Needless to say, the Internet makes finding these sorts or references much easier.)

Stuffed and Roast Mutton; Called “The Complete” [or “The Inclusive”]

Take a plump skinned ram; make a narrow opening in the belly between the thighs and take out what is inside it and clean. Then take as many plump chickens, pigeons, doves and small birds as you can; take out their entrails and clean them; split the breasts and cook them, each part by itself; then fry them with plenty of oil and set them aside. Then take what remains of their broth and add grated wheat breadcrumbs and break over them sufficient of eggs, pepper, ginger, split and pounded almonds and plenty of oil; beat all this and stuff inside the fried birds and put them inside the ram, one after another, and pour upon it the rest of the stuffing of cooked meatballs, fried mirkâs and whole egg yolks. When it is stuffed, sew up the cut place and sprinkle the ram inside and out with a sauce made of murri naqî’, oil and thyme, and put it, as it is, in a heated tannur [clay oven] and leave it a while; then take it out and sprinkle again with the sauce, return to the oven and leave it until it is completely done and browned. The take it out and present it.

I found this recipe while putting together a Medieval feast for about 100 or so, several years ago. While I might have been momentarily intrigued by the idea of cooking an entire ram stuffed with all sorts of small poultry and game birds (not to mention mirkâs [aka lamb sausages] and meatballs) , it was a short-lived fascination. Instead, I made it much more manageable by taking the essence of the recipe and scaling it down into something a modern-day cook could make for her family or a group of friends.


Medieval Andalusian Lamb

Medieval Andalusian Lamb

Here’s how to taken this recipe from Medieval to Modern:

Medieval Andalusian Lamb

The Stuffing: 

1/2 lb. Chicken breast, cooked and shredded
1 cup Almonds, roughly ground
1 cup coarse breadcrumbs
2 Eggs
1 tbsp Pepper
2 tsp Ginger
1/2 cup Chicken broth
2 Tbsp olive oil

The Lamb: 

6 to 8 lb. Leg of lamb, de-boned

The Basting Sauce:

1/2 cup Olive oil
1/2 cup Soy sauce
2 tbsp Thyme

Ingredients for the lamb fillingThe stuffing is quite simple: just toss everything into a bowl and mix thoroughly. You want something crumbly that sticks together, not soupy. Set aside until ready to stuff the lamb.

A few notes on the ingredients, though.

Almonds are quite common in Medieval recipes, used for their flavor as well as to thicken sauces and add texture. If you have an almond allergy in your home, walnuts and hazelnuts are both mentioned in other recipes of the period and would be appropriate substitutions (with hazelnuts being the better choice, flavor-wise). If yours is a strictly no nuts household, though, you could leave them out but the dish would suffer. We opted for something modern but safe: soy nuts. Whichever you choose, pulse them around in a food processor (or give them a few good whacks with a mortar and pestle if you’ve got one handy) to break them up but leave the pieces fairly large, just like the breadcrumbs.

Making coarse breadcrumbs the semi-old fashioned wayBreadcrumbs, in this instance, are not the powdery sort we buy in the store. Even the panko-style breadcrumbs are a little too fine. What you really want is to take a few slices of day-old bakery bread (or a couple of large bakery rolls) and shred them either in a food processor or with a box grater.

Deboning the lamb is simpler than it might seem. After doing more than 10 of these in my lifetime I’ve gotten quite good at them and have figured out the best possible plan of attack.

Tip #1 Defrost the lamb only partially. In school we took meat-cutting class in the walk-in refrigerators. A big part of food safety is temperature control so keeping the cold food cold while you’re manhandling it is important. Leaving the large hunk of meat semi-solid also makes it easier to cut through and less slippery as you move the pieces around.

the de-boned lamb

(vegetarians may want to look away)

Tip #2 Follow the bones you can see. You’ve probably got two bits visible: the skinny end of the leg bone and the hip socket. Do yourself a favor and start with the leg bone, following it straight up until it bends towards the hip socket. Then make a long cut between that bend and the visible hip socket. After that it’s just a matter of making small, precise cuts along the bone, separating the muscle without piercing the skin.

Tip #3 Save the bone! Pop it in the freezer until you want a really rich stock (like for French Onion Soup). Roasted bones make amazing stock and soup bases and a good Medieval cook would never throw away such wonderful raw materials.

Once the leg of lamb is de-boned (or if your butcher did that part for you and you’re now joining us at the counter), spread it out into as rectangular a shape as possible, with the cut side facing up. To make this work you may need to “butterfly” certain sections to stretch and flatten the larger muscles into the desired shape. Also, having the lamb on a flexible cutting board or sheet of wax paper will help with later steps (which I totally forgot to do this time and paid some messy consequences).

The flat and tidy lamb leg, ready for stuffingPat the stuffing mixture over the lamb, leaving a clear border along the long edges.

adding the stuffing to the lambCarefully roll up the layered lamb into a long cylinder. If you’ve got someone to lend an extra pair of hands it helps as you tie the roast closed with kitchen twine to keep it together in the oven.

Stuffed, rolled and tied leg of lamb(At this point you can wrap the stuffed leg of lamb in plastic wrap and foil and freeze for up to 2 months with no fear of spoilage. Defrost completely before roasting.)

To roast the stuffed leg of lamb, preheat your oven to 350° Fahrenheit. Mix together oil, soy sauce and thyme and pour about half of the mixture over the lamb which has been placed seam-side-down in a roasting dish. Roast for 9o minutes, basting with the other half of the oil mixture after about 45. Start checking the temperature after an hour–the center of the roast should be at 165° F to ensure doneness (a little pink on the lamb itself is generally a good thing, though).

in the roaster and basted with the sauceLet the finished lamb rest for 10 minutes before removing the twine and slicing into ½-inch thick portions. This should make between 8 (double-sized) to 16 (normal-sized) servings: perfect for a big family dinner or entertaining.

Adding Another Flavor Layer

In the original recipe, in addition to the stuffed poultry, meatballs and sausages were also called for. I’ve not included them in the past but since I was subbing out the almonds and taking away that little edge of the flavor, I wanted to add something else. Even though they look like meatballs, they’re actually flavored the way the mirkâs would be because I thought that was more interesting.

I totally eyeballed it, but to a pound of ground lamb I added somewhere in the neighborhood of:

2 Tbsp Soy Sauce | 2 tsp Pepper
2 tsp Coriander | 1 tsp Cumin
1 tsp Lavender | 1 tsp Cinnamon

The only thing I’d add for the next time is at least 1 egg. Ground lamb tends to be incredibly lean and it can become dense and a little mealy without a little added fat.

Did they really have Soy Sauce in 13th century Andalusian Spain?

Not exactly. What they had was a sauce called murri naqî’ which was a fermented, salty grain-based condiment they used quite heavily in many of their dishes. When I first made this recipe, it wasn’t feasible to make your own murri naqî’ and soy sauce was the best fit out of modern products. Now, I learn, others have succeeded in making their own murri naqî’ , but soy sauce is easily available and accomplishes that umami flavor that’s needed.

~~~oOo~~~

If you’ve tried this and posted it on your own blog, link up in the comments below! And don’t forget to sign up for the mailing list to get the new challenge delivered to your email inbox at the beginning of each month!

A Day at the Faire

Nibbles

Renaissance Faire Entertainment
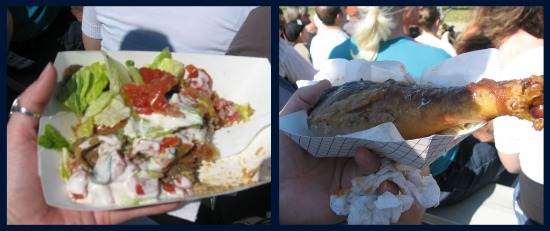
A couple weeks ago Todd and I, along with our new friend Andrea, traveled over to Pensacola to check out the Gulf Coast Renaissance Faire for the day. Thanks to a convenient time-zone crossing we made it to the Faire-grounds (a 3-hour journey) in just over 2. Talk about time travel!

First we happened on a talkative blacksmith demonstrating her process of making a simple bar of steel into something useful and lovely. There were several vendors throughout the central area of the Faire and we spent most of the first hour or more perusing their wares. It reminded me of a cross between a craft fair and Merchant’s row at an SCA (Society of Creative Anachronism) event.

In addition to various retailers, there were five stages set up for entertainment. There were continuous belly-dance performances in Arabia, variety acts on several stages and a field with fencing demonstrations and, yes, actually jousting by riders on horseback.

Reminiscent of a trip to Medieval Times, the spectators were divided into cheering sections for each of the combatants as the riders jousted and then competed in a series of skill exercises for points. It was quite breathtaking to watch–the charving hooves, the splitting of wood upon steel armor. Whew!

There was also a display of falcons and other birds of prey, including a hawk that chose to go on a little side adventure of his own.

It was quite a day.

But, of course, the question you may be asking yourselves is: what did we eat?

Ringing the Faire were all manner of food carts, most of which you’d see at any carnival or local festival: corn dogs, funnel cakes, burgers and fries, chicken sandwiches, popcorn, slushies, etc. Kebabs were available at many stands and they were, at best, the most close-to-authentic food available.

We, however, opted to order from Phil’s Mediterranean–they at least didn’t have your standard carnival truck but were sporting some inventive decorations and atmosphere. Granted, the gyro-meat that I ordered on my “gypsy plate” (brown rice and lentils seasoned with almonds and cranberries and topped with Greek-style salad) was of a style invented in the 19th century–well after the end of the Middle Ages; the most authentic ingredients of the dish were almonds and lentils.

And the turkey leg that Todd just had to order? Turkeys weren’t introduced to Europe until the late 1500s–kinda pushing it for a common Medieval food.

Renaissance Faire Food

What IS Medieval Food?

Trade was big business in the Middle Ages, but even with a relatively colder climate than we have now, long-distance trade of meats and vegetables wasn’t very efficient. Folks ate incredibly local, very little went to waste, and even though basic preservation skills like smoking, drying and salting were known and used, food was fresh more often than not. Spices, however, traveled well and were very expensive so were perfect for rich houses to show off their wealth to guests. Vegetables were not as uncommon as many think, though they were boiled or roasted more times than not.

Strangely enough, turducken is incredibly close–in theory, at least–to a lot of the medieval food I’ve made and studied. The cooks of the Middle Ages (those of the wealthy houses, of course) really liked the idea of stuffing a large animal with all sorts of smaller foods and roasting them all together. One of my most well-received lamb dishes is based (and by that I mean scaled down to a normal kitchen’s demands) on an Andalusian recipe that called for an entire ram to be stuffed with stuffed small poultry, meatballs and sauce of almonds.

This experience got me thinking: how much fun would it be to have a Medieval Cooking Challenge like the Indian one I participate in each month? So I’ve started one! If you’re curious about Medieval food and want to try out authentic recipes from long ago, check out the Medieval Cooking Challenge page and sign up! I’ll be sending out the first recipe for the challenge on April 1st!